


Introducing The Creative Photography Quest
- May 14
- 4 min read
When you want to take your wildlife photography to the next level, which creative techniques and accessories are really worth
the time to learn, the money to buy and the extra weight in your bag?
I'm testing, rating and reporting back!
I've been on a creative photography quest for a long time - as long as I've been a photographer! - and from now on I'll be sharing my experiments and findings with you here in a monthly blog. Some things will work, others won't; some will be expensive mistakes, others free gems that could rock your creative world. I'll be inviting you to share your experiences with the various subjects we cover, so I hope you'll join me and enjoy our creative journey!
Why Join Me On A Creative Quest?
There is a dazzling array of techniques and accessories which promise the earth in advancing our photographic creativity, but all too often they fall short of those promises and disappoint.
In my Creative Photography Quest blog I'll be exploring in-depth which techniques can be really worthwhile taking the time to get to grips with, for wildlife photography in particular. And I'll assess which accessories rise above the level of a gimick that's fun for a day to become an integral part of my photographic kit - worth the money to buy and the extra weight in my - and possibly your - bag.
So to our first port of call...
Presets
What are they? They are basically a bundle of edit settings that have been saved together and imported as a file into Lightroom. They can then be applied to an image with just a single click.
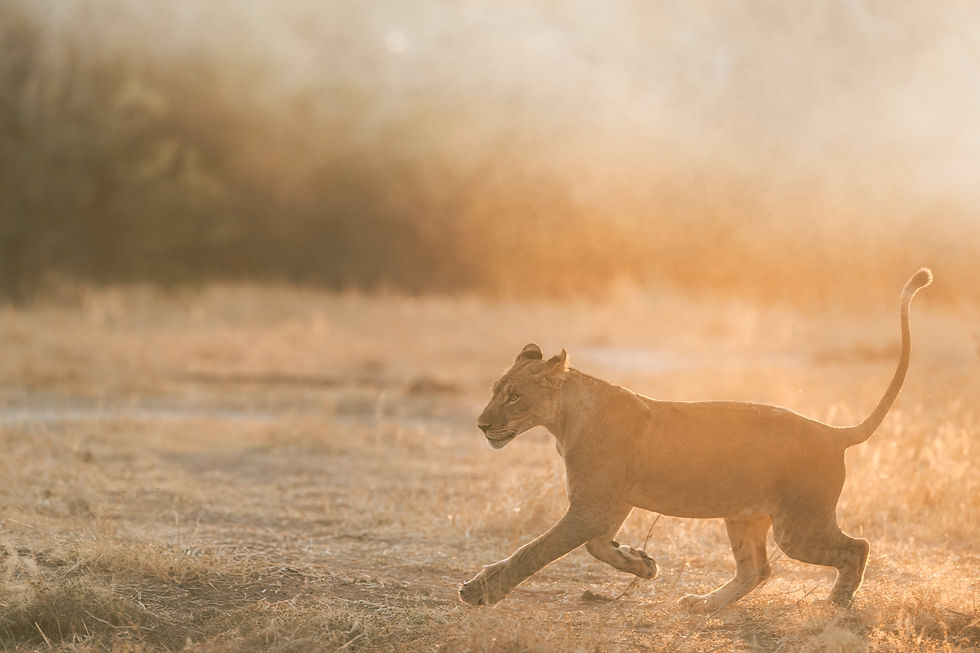
I’ve generally stayed away from using presets up to now when editing my wildlife photographs. However, with a resolution to stay open-minded in all things deemed creative, I thought I’d have a go at applying some to this lion shot, taken on a recent photography safari in Zimbabwe at Mana Pools, which is famous for its incredible light - it didn't disappoint!
I do love these early shots, with the subject backlit and dramatic dawn light flooding the scene. However I do often find them tricky to edit, so I decided to do some experimenting in in Lightroom.
This is my original shot, straight out of the camera, no editing at all on this one.

And here are five edits: one is my original edit (not saying which!) and the other 4 have presets added.


Bright and bleached
More saturated
Similar to above, but slightly cooler
Flatter and more green tint
Black and white
Which number 1-5 you prefer? My own favourite versions are 1 and 4 as I l am a sucker for a high key bleached look, though I also like the more natural flatter image with a slightly contrasting green tinge. Of the two similar edits I prefer the slightly cooler edge. I usually love b&w but this particular preset didn't do it for me - I'd have liked more contrast so would tweak it and save my own version (see Make Your Own Presets below) Please comment with the number of your own favourite.
Now let's see how various types of presets rate against our Creative Quest Criteria.
Rating Three Types of Presets
Basic presets loaded as standard in Lightroom
There are free basic presets loaded as standard in Lightroom. You can find the Preset section in the left hand window of the Develop screen, then just hover over the names of the presets to see what the various results will be in your image, and click to add the one you want.
Time Rating 5/5 - instant click
Money Rating 5/5 - free
Weight Rating 5/5 - nothing extra to carry
Even better free alternative: make your own Lightroom Presets!
If you have edits that you're proud of and could use the settings again and again here's a link from Adobe on how to turn them into your own custom presets...very satisfying!
Time Rating 4/5 - doesn't take long to learn and saves time in the long run
Money Rating 5/5 - free
Weight Rating 5/5 - nothing extra to carry
Bought preset packs
These are on offer all over Instagram and photographic websites - some pretty expensive and some less so ... find an offer, they always seem to be on offer!
Here's how to install them in Lightroom:
From the menu bar, choose File > Import Profiles & Presets.
In the Import dialog that appears, browse to the required path and select the profiles or presets that you want to import.
Click Import.
Time Rating: 4/5
Money rating 3/5 for bought packs
Weight Rating 5/5 - nothing extra to carry
Recommended Creative Quest Option
Hands down my recommendation is to start with the freebies, tweak them and move on to making your own presets - you'll learn lots and save both time & money - lots to love!
Overall Creative Quest Rating For Presets: 3.5 / 5 (Why Not More?)
Presets offer infinite possibilities for playing around in post-processing, with little time required and no investment needed if you explore the freebies and make your own. Plus there's nothing extra to cart around in your bag. So far so great... however presets alone are unlikely to revolutionise your photography.
I hope this has sparked your curiosity for presets and I'd love to see shots that you've edited successfully with presets of your own making - do share them please! And of course even better if you'd like to share any tips!


Comments